- The sawdust newsletter
- Posts
- Issue #18
Issue #18
In today’s issue - A lesson in efficiency, a beautiful Irish Arm chair, and Hand stitched rasps.
David Walton
December 31, 2025
From The Bench

Nearly a week ago I took some time out from the drawer/organisation project for my shed, to build a much needed coat hanger for a cupboard door. I wanted the hanger to be quick, but I also wanted to use only hand tools, since I've used power tools heavily over the last 3 months, and wanted a break from them. After I built the hanger I decided to write this article, to accompany the video build, because I thought there was a lesson in efficiency and practicality. I also thought for a beginner in hand tools, this would help to gain some skills.
The hanger wasn't built to be pretty, as I said (for me personally) I was looking for efficiency, practicality and simplicity. How quickly (not rushing) could I make this? It took around 3 hours which included starting and stopping the camera, and changing the many different angles to try out a new style of shooting a video.

Hole’s drilled at 110 degrees
I used some scrap oak for the build I had lying around, which should hold up nicely. The rail section received 4 holes with my brace and bit, angled at 110° which I checked with a sliding bevel, very loosely. I also opted to round the outside edge's to keep with the roundness of the pegs. I did consider a simple (and quicker) chamfer, but it just didn't seem right. I also added two small holes for screws to fix the hanger to the door.
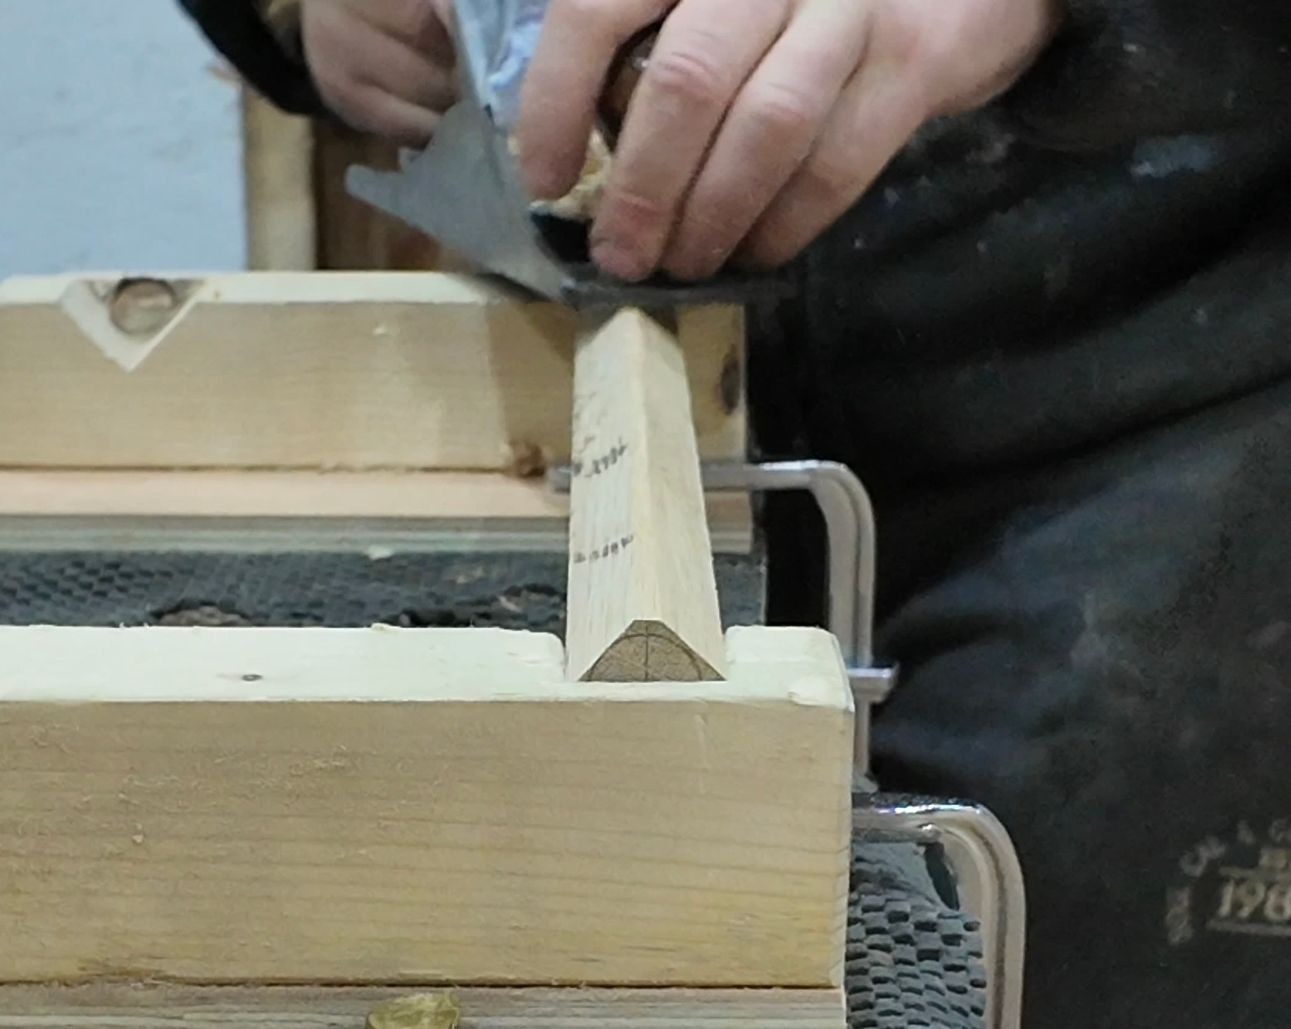
I made the dowel with a couple of jigs/holders I made some time ago (watch the video here), which work really well to hold stock as I plane it round. Again this was done quickly, and the pegs weren't truly round. I take more time when rounding legs etc. because they're seen, with the pegs I didn't need to be so fussy, because they won't be seen a great deal. To remove the sharp edges on the end I used a utility knife, again a little more finesse could have been used. I also burnished them to compress the fibre's, to stop any splintering which may snag clothing, this also helps to compress any sharp edges to soften the roundness. The pegs themselves are 3/4" thick, and this is purely for longevity. There's no way in hell those pegs will break, unlike a more refined slimmer peg, that would (admittedly) look better. I glued the pegs in place and wedged them, with some wedges I split from the leftover dowel stock. I also added a saw kerf instead of splitting the dowel, like I would for a conical tenon on a chair leg. Admittedly I was a little worried about the peg potentially splitting to far, or even in half with it being short in length. I'm currently out of finish at the moment, and the only thing I had to hand was bees wax, and so that was applied.
So what I ended up with was a very simple (but stout) coat hanger that will probably out see me, and an unintentional lesson/reminder in efficiency, although this is a far cry from an 18th century craftsman, expected to make and finish a small table in a day (from scratch), the lesson is there for those who will explore it.
Maker Spotlight
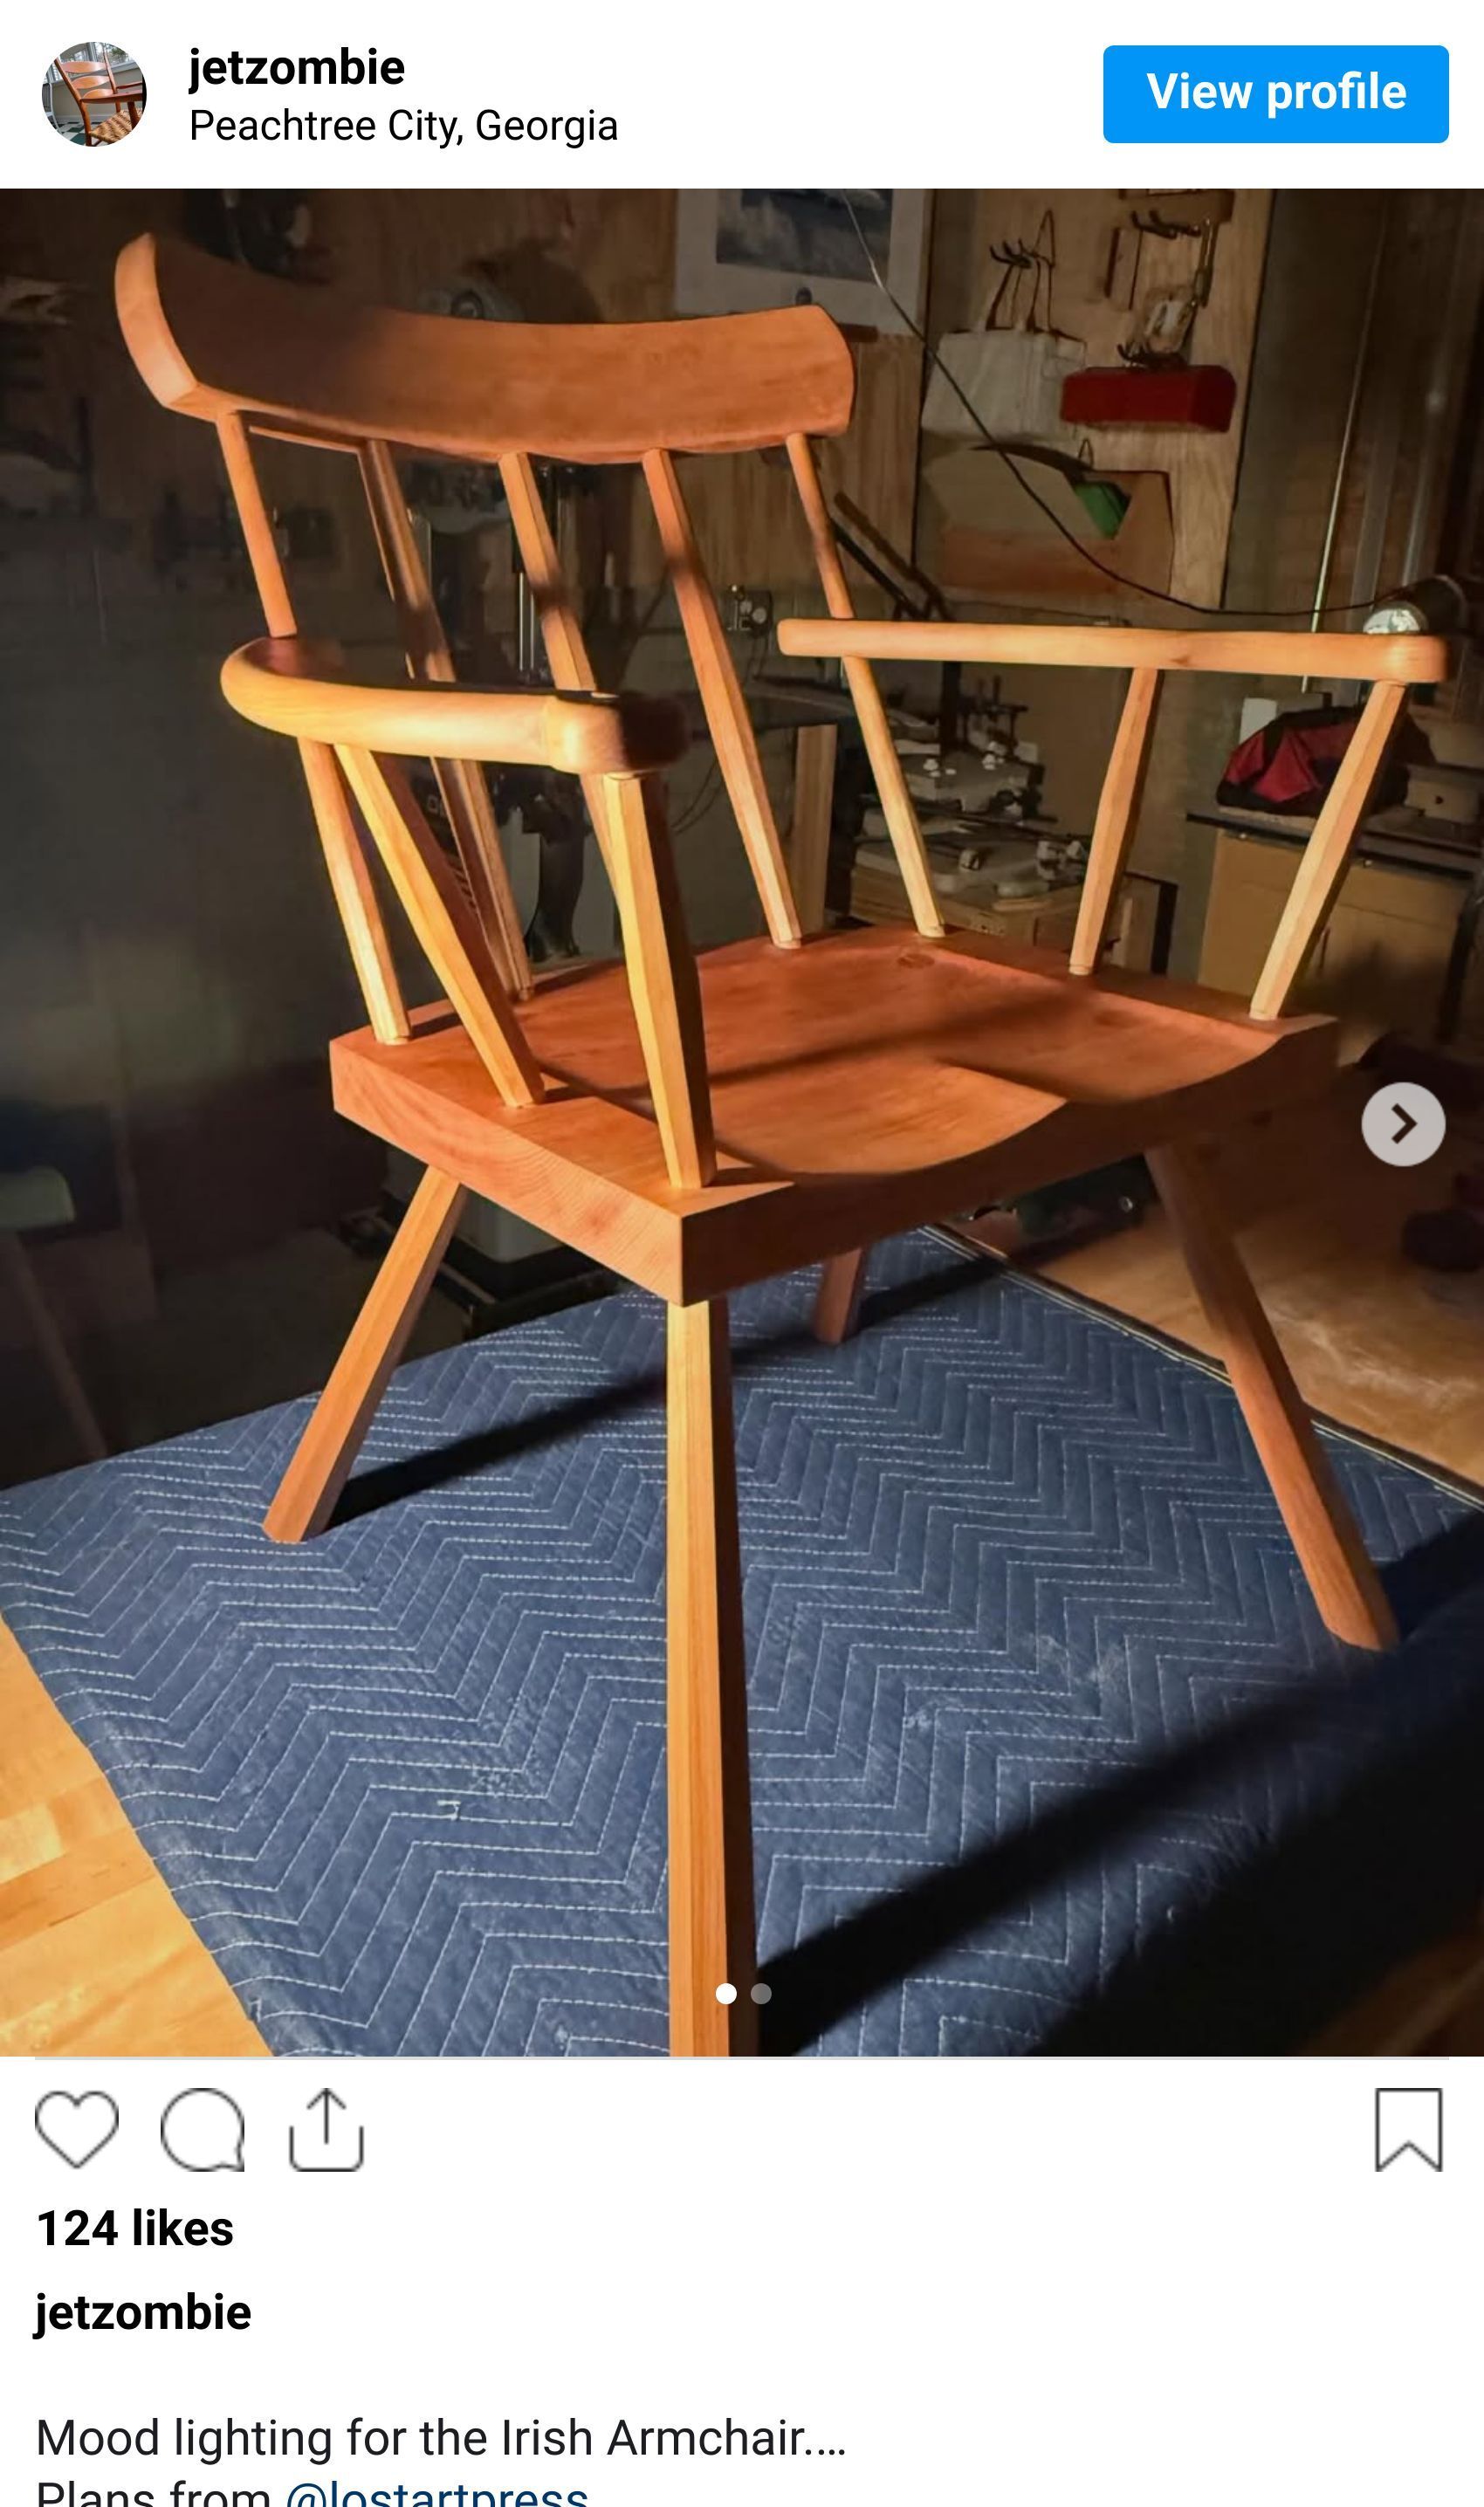
This beautiful Irish arm chair is the the work of jetzombie. I think out of all the stick chairs, this is my favourite form, and I also hear they're very comfortable. I do hope to get one built this year, but who knows! The man responsible for this beauty, makes everything from chairs to shaker baskets. Click the picture and give him a follow over on Instagram to see his work, you won't be disappointed.
Question Of The Week
Q. I've just built my first bench, and spent all the funds on the materials, and have no extra to get a vise. Do I really need a vise, or can I get by until I get some extra funds?
-Carlos Barcelona, Spain.
A. Despite what many will say, you do NOT need a vise at all, but let's get the obvious out of the way. Is it good to have a vise, and will it make life easier? Absolutely, they are a great addition to the workbench, however, if you look at my past work on social media, you'll see lots of vise-less work holding, especially when I was using a Roman workbench pretty much exclusively. A lot of the work holding techniques (not all), do transfer over to a tall bench, and you'll see me (if you look) using pegs and wedges, dogs, rubber mats, clamps etc. I've gotten by very comfortably without a vise, and there has been nothing I haven't been able to do. There is a video I put out about work holding on a Roman workbench, which should give you some good ideas, you can watch it here. I am also planning to do an updated version for a tall bench, so if anyone is interested, subscribe or keep an eye on my YouTube channel.
Do you have a woodworking related question? Reply to this email, or login and leave your question below. I read them all and will feature one in the next issue.
What Caught My Eye

Above is a video (click the image to watch) of a man hand stitching a rasp. I'm unsure of the sticher, but it is a company working out of France (tarn) called Auriou. Originally posted by Ben who also works for the company, but I think he was behind the camera this time? It's absolutely mesmerising to watch the precision, and attention to detail. I wonder how many times a hammer was struck to make this rasp?
Final Shavings
In case you missed it, my last video (building a coat hanger) can be watched here, and a podcast is available to those who are interested. You can listen on Spotify here, and Apple Podcasts here, and watch on YouTube here.
I'm still making the drawer modules which are nearly finished. If this interests you, keep an eye on my Instagram and YouTube for posts, and videos.
If you’ve enjoyed this, feel free to share with someone who’d appreciate it. This will help to grow and support the newsletter.
Until next time
-David
DW Woodworks
Reply